Direct Marketing Lists Logo
ENQUIRY FORM SITE MAP EMAIL US HOME PAGE  
 
Header Left Saving And Importing Your Data Header Right
 

Below is brief tutorial on the subjects of saving your data to your hard disk and then importing it into Microsoft Access. The standard way in which Direct Marketing Lists supply data is in Microsoft Excel as an email attachment. Using Microsoft Access is an easy & effective way of querying and manipulating the data.


Saving Your Data To Your Hard Disk

1. Open the email that has the data attached. Place you mouse curser over the attachment and right click on it. From the drop down menu click "Save As...".

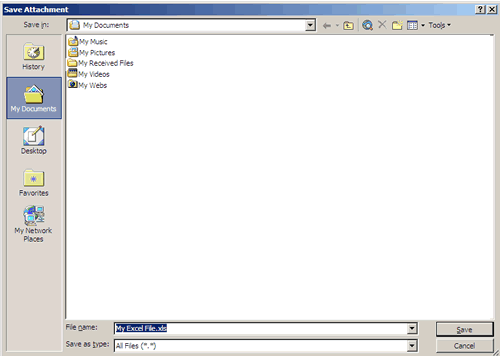
 
 
2. The 'Save Attachment' dialog box appears & 'My Documents' is selected by default. If you wish to rename your file you can do so in the "File Name:" box at the bottom. If you wish to save the file somewhere different to the 'My Documents' folder, navigate to the desired folder. Click "Save" in the bottom right corner. That's it your data is now saved to the My documents folder on your hard disk.


Importing You Data Into Microsoft Access 2002

1.Open the database that you wish to import the data into. Click "File" (on the top toolbar), "Get External Data" and the click "Import".

Top of Page
 
2. The 'Import' dialog box appears and again 'My Documents' is the default folder. Select "Microsoft Excel" from the 'Files of type:' drop down menu at the bottom of the dialog box. The Excel file that you saved earlier appears. Click the Excel file once, then click the "Import" button. Alternatively you can just double click the Excel file.
Top of Page
 
3. The 'Import Spreadsheet Wizard' dialog box opens. Ensure that the 'Show Worksheets' radio button is checked and click "Next" in the bottom right of the box.
Top of Page
 
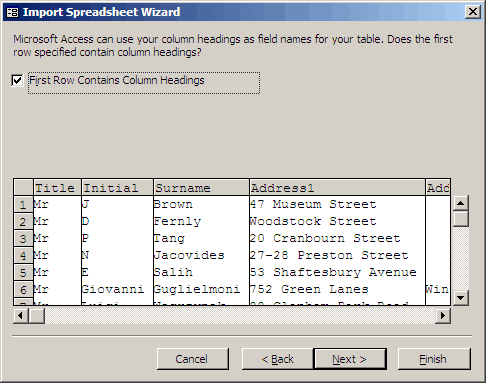
4. Tick the 'First Row Contains Column Headings' and click "Next". In the nxt dialog box check the 'In a New Table' radio button and click "Next" again.
Top of Page
 
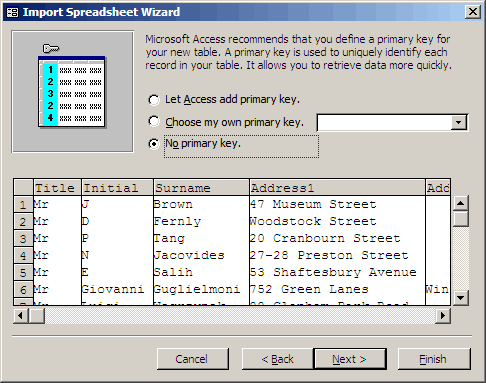
5. Click "Next" once more. Check the "No primary key" radio button and click "Next". You can add a primary key at a later date if you need to.
Top of Page
 
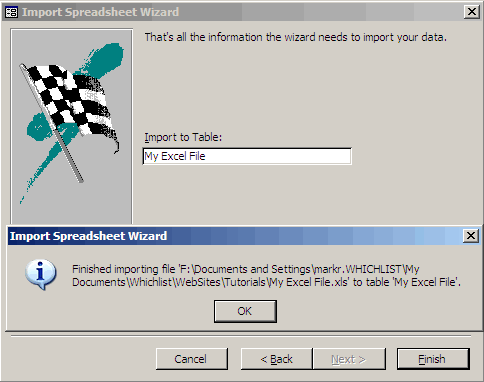
6. Click in the 'Import to Table:' box and type the name that you wish to call your imported file. Click "Finish" and then click "OK".
Top of Page
Top of Page